I am very excited to have Toni from SugarTart Crafts here today to share a wonderful sewing activity for kids. I must admit sewing is a bit out of my comfort zone but this activity is easy enough for even a child to do. I enjoy reading Toni's blog because she has great ideas for food, crafts, and kids fun.
Hi there Mess for Less Readers. I'm so happy to be visiting you today!
My name is Toni, and I blog over at SugarTart Crafts where I focus mostly on sewing projects for my 2 year old daughter and our newest addition (on the way).

I have to admit, that while I was completely honored that Vicky asked me to share something with all of you, it was a bit difficult to switch gears from my recent "all baby all the time!" mentality. But eventually I remembered one of my favorite things to do as a little kid, and knew exactly what I wanted to write about.
Plastic Canvas!
Did anyone else ever play with it as a kid?
My Gramma would often hand me a sheet of canvas, some scissors, and a bag of yarn.
Then I would sit on the sofa and remain miraculously silent for hours at a time.
What Mom doesn't dream of that kind of response to a craft?
The amount of "parental involvement" in this project varies greatly depending on the age of your child,
but can easily entertain most kids between the ages of 4 and 10.

Supplies:
Scissors, Yarn, Sheets of plastic canvas
(It comes in a variety of colors, and can be found at any craft, fabric, or wal-mart type store.)


A blunt needle
These come in metal or plastic, but make sure that the eye of the needle is not too large to fit
through the holes of the canvas. The 5mm worked perfectly. (I learned the hard way!)
Optional:
Magnets, Glue, Felt, and Graph paper


Cut out your desired shape.
You can use the graph paper to help your child design their own.


Use the yarn to make diagonal stitches from the bottom left to the upper right.

The yarn "tail" can be secured behind the first few stitches.
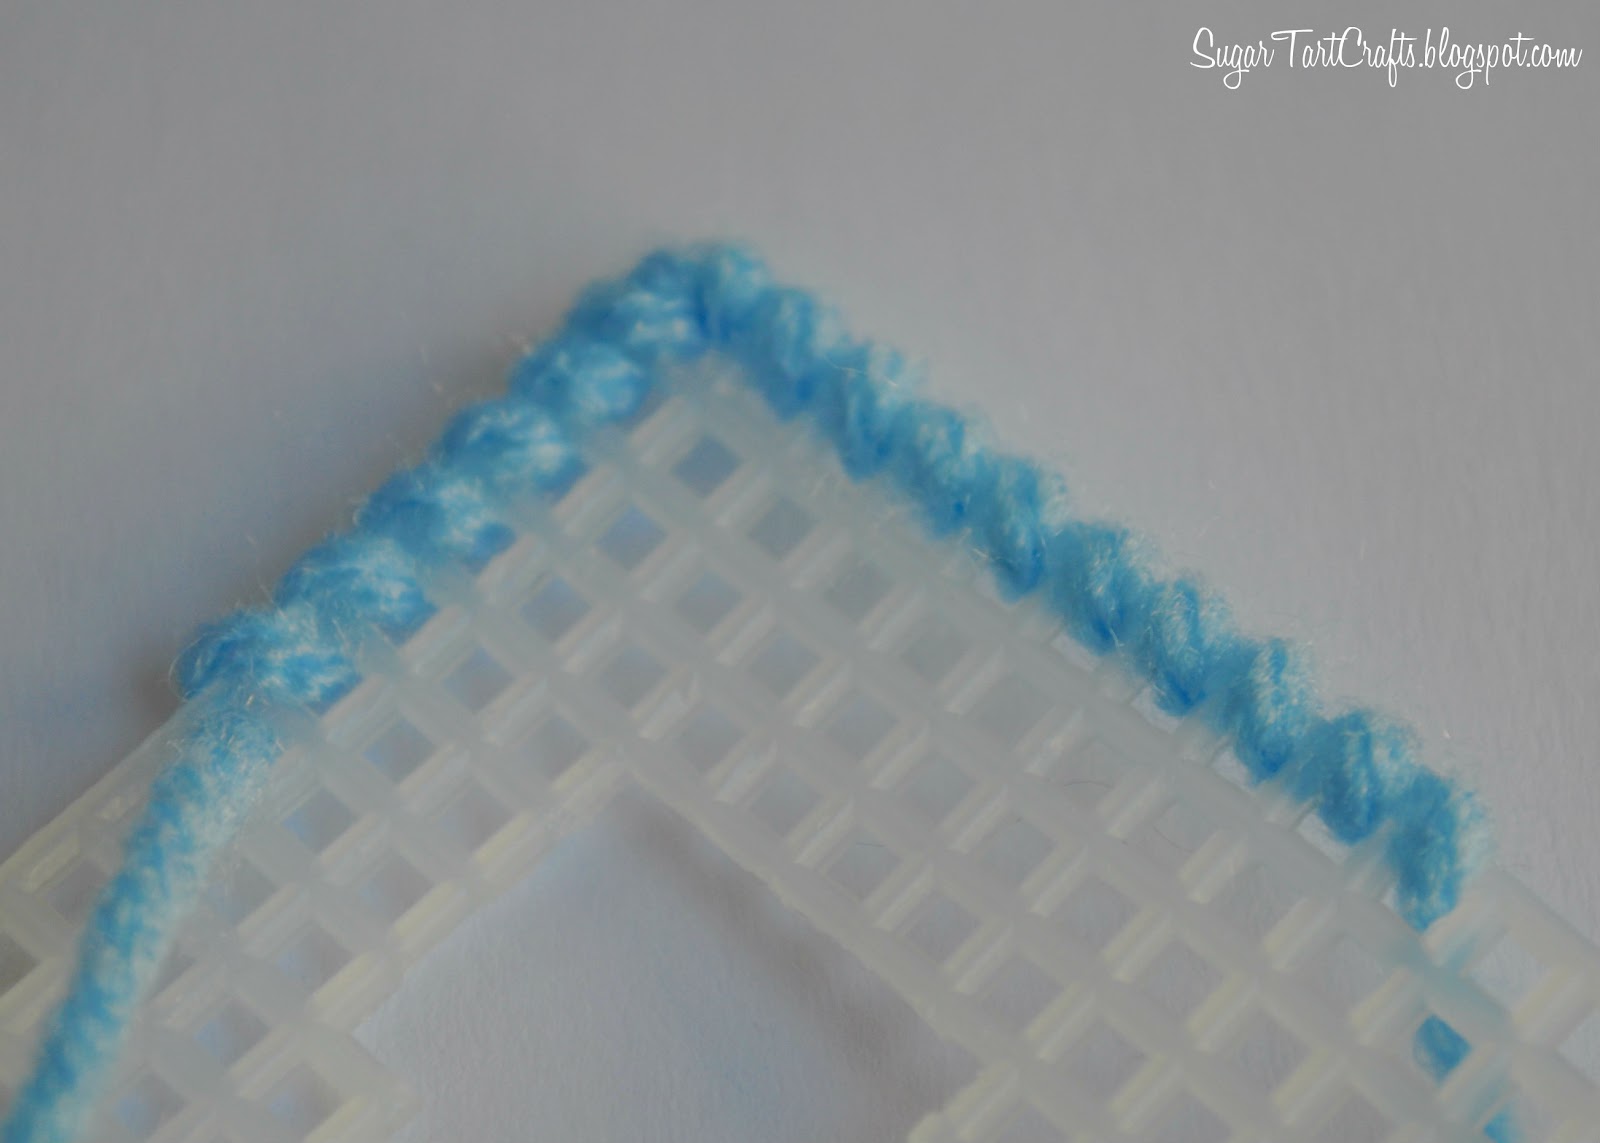

Once all the rows are filled with diagonals, wrap the yarn around the edges,
and hide the ends under the stitches on the back.

Now you can glue on a some felt to make the back prettier,


add some magnets and stick them to the fridge,

or string a few together for a garland.
And in case you need a little extra inspiration, here are a few alphabet printables!


Just click on one of the 3 boxes to get started.
These letters are roughly 3 inches tall by 2 inches wide, and don't worry, they'll print in grey so you can really see the grids, and it won't use up all your ink.
source: http://www.messforless.net/2012/03/plastic-canvas-letters-guest-post-from.html
source: http://www.messforless.net/2012/03/plastic-canvas-letters-guest-post-from.html
No comments:
Post a Comment