I’d like to thank everyone who commented on, and pinned my Upcycled Kleenex box post last week. My blog is very new and I appreciate the support! You can help me grow even more by becoming a follower on the right.
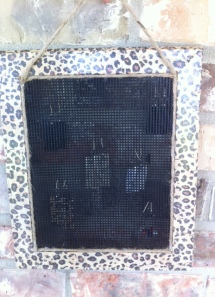
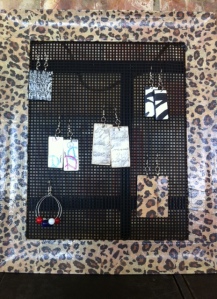
Isn’t this the perfect way to display your favorite earrings? Way-back-when, I saw something similar in a magazine (maybe BHG), using a picture frame with burlap to hang the earrings. Since then I’ve seen MANY variations on Pinterest. I had filed this away in my “Going to Make Someday” file. The photo above is one of the more recent variations I’ve made.
Because I’m so busy and don’t have time to plan in advance (OK – maybe at times I procrastinate), I realized as I was leaving work the day before my children’s Christmas parties at school, that I didn’t have Christmas gifts for their teachers. GULP!! One of the girls had activities that night (probably dance), and I knew I wasn’t going to have time to shop for anything (and, I really like to make unique gifts for the teachers). What to do, what to do?
I scanned the “Going to Make Someday” file in my mind (storing it there saves paper), and thought of these. Then I went work thinking about how I would modify them, and what I could use as a material to hang the earrings. After two quick stops at Hobby Lobby and Dollar General (both on my way home – convenient huh?), I had all the supplies I needed. Here’s the supply list I came up with:
- Mod Podge – have at home
- glue gun & glue sticks – have at home
- tulle fabric to use as a hanger – have at home
- pretty scrapbook paper – purchased at Hobby Lobby (on sale that week – yay!)
- plastic canvas (for needle point) – also purchased at Hobby Lobby
- picture frames – $2 each at Dollar General

This is how I put it together:
Remove the glass and all backing from the picture frames – the frames I bought had cardboard backing all around the back that I had to tear off (and remove staples).
Decorate or paint your frame. Originally, I used strips of scrap-book paper decoupaged to the frame.
I’m very impatient to finish once I start a project; in the past I’ve been guilty of using too much Mod Podge when decoupaging and either creating bubbles under the paper or turning the paper to mush. It’s taken me years to develop my decoupage technique (that I’m sure a more patient person got right the first time).
To avoid bubbles under the paper when decoupaging, I spread a thin layer of Mod Podge over the entire surface I’m covering. I carefully spread the paper over the decoupaged area and push out any bubbles then I let it dry for a few minutes (doesn’t take long to dry). Next I spread a very thin layer of Mod Podge over the entire paper and let that dry for a few minutes (again, it doesn’t take long to dry – check your email while you wait). Once that layer has dried, I spread several more layers (using the same spread and let dry technique).
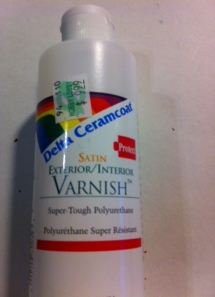
I like to finish anything I’ve decoupaged with a thin layer or two of varnish.

Cut the plastic canvas to fit the photo opening, place in the photo opening, and hot glue.
The first several I made, were not very nicely finished on the back because the glue oozed through the grid of the canvas. Since you don’t see the back, that’s really not a problem, unless you are a crazy like me and like to have a nicely finished product (front and back).
Now, when I make these I use jute (as I’ve mentioned I have a VERY large roll that I purchased for a previous project) pressed into the hot glue (as I’m gluing). It gives the back a more finished look, helps adhere the canvas to the frame, and you can leave it long enough to make a hanger with the jute.

If I’ve decoupaged or painted the back of the frame, I skip this step, but if the back of the frame looks unfinished (if it had staples or glue), then I cover it with felt.

I just love these earring displays, they are the perfect storage solution (especially for me since the surface of my dresser used to be covered in mismatched earrings). I’ve let my imagination run wild when decorating these… Check out some of my more recent creations.
This is decoupaged front and back with tissue paper, then varnished for shine; it hangs on the wall.

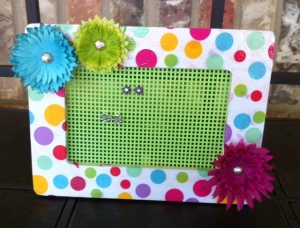
This is a smaller version. The frame is an unfinished frame from Michael’s with the dowel stand in the back, so it sit’s on the table top. It’s also decoupaged with tissue paper; I added the flowers by nailing them to the frame with upholstery tacks. Cute for a little girl!

And, finally something a little different; no decoupage. I used some shells that we’ve collected, and some smaller shells that I bought on clearance many years ago (don’t even remember where), all carefully arranged and painstakingly glued to the frame (that took a while).


I hope your inspired to make your own earring display. If you have made one, or if you do, I would love for you to share!!
Do you have any other ideas for cute framed earring displays?
Happy creating!
source: http://southernflaircrafts.wordpress.com/2012/06/18/earring-display/
No comments:
Post a Comment